Please note that this post contains affiliate links. Thanks for your ongoing support!

The most un- eggs -pected Mother’s day starts with the eggs – ceptional, eggs-traordinary Butterfly and Flower Eggs! With a little effort, eggs and molds you can make a most eggs-tra breakfast for Mom and that’s no eggs-aturation.
An Eggs-traordinary Mother’s Day Breakfast
The best, most Eggs-traordinary Mother’s Day Breakfast is the most un-Eggs-pected! This is one of the most beautiful and unique Mother’s Day breakfast ideas I’ve ever seen. Using your favorite springtime silicone egg molds, and appropriately sized eggs, you can color and poach the most gorgeous experience for Mom.
And she totally deserves it!!!

How I came up with these uniquely breathtaking Mother’s Day Breakfast Eggs
A while back I came across an Instagram reel where the Poster made “poached eggs” in a silicone mold. I was really intrigued by the idea, and was determined to improve upon a theme.
It was important to me to make them brighter and more appetizing, so I was on a quest.

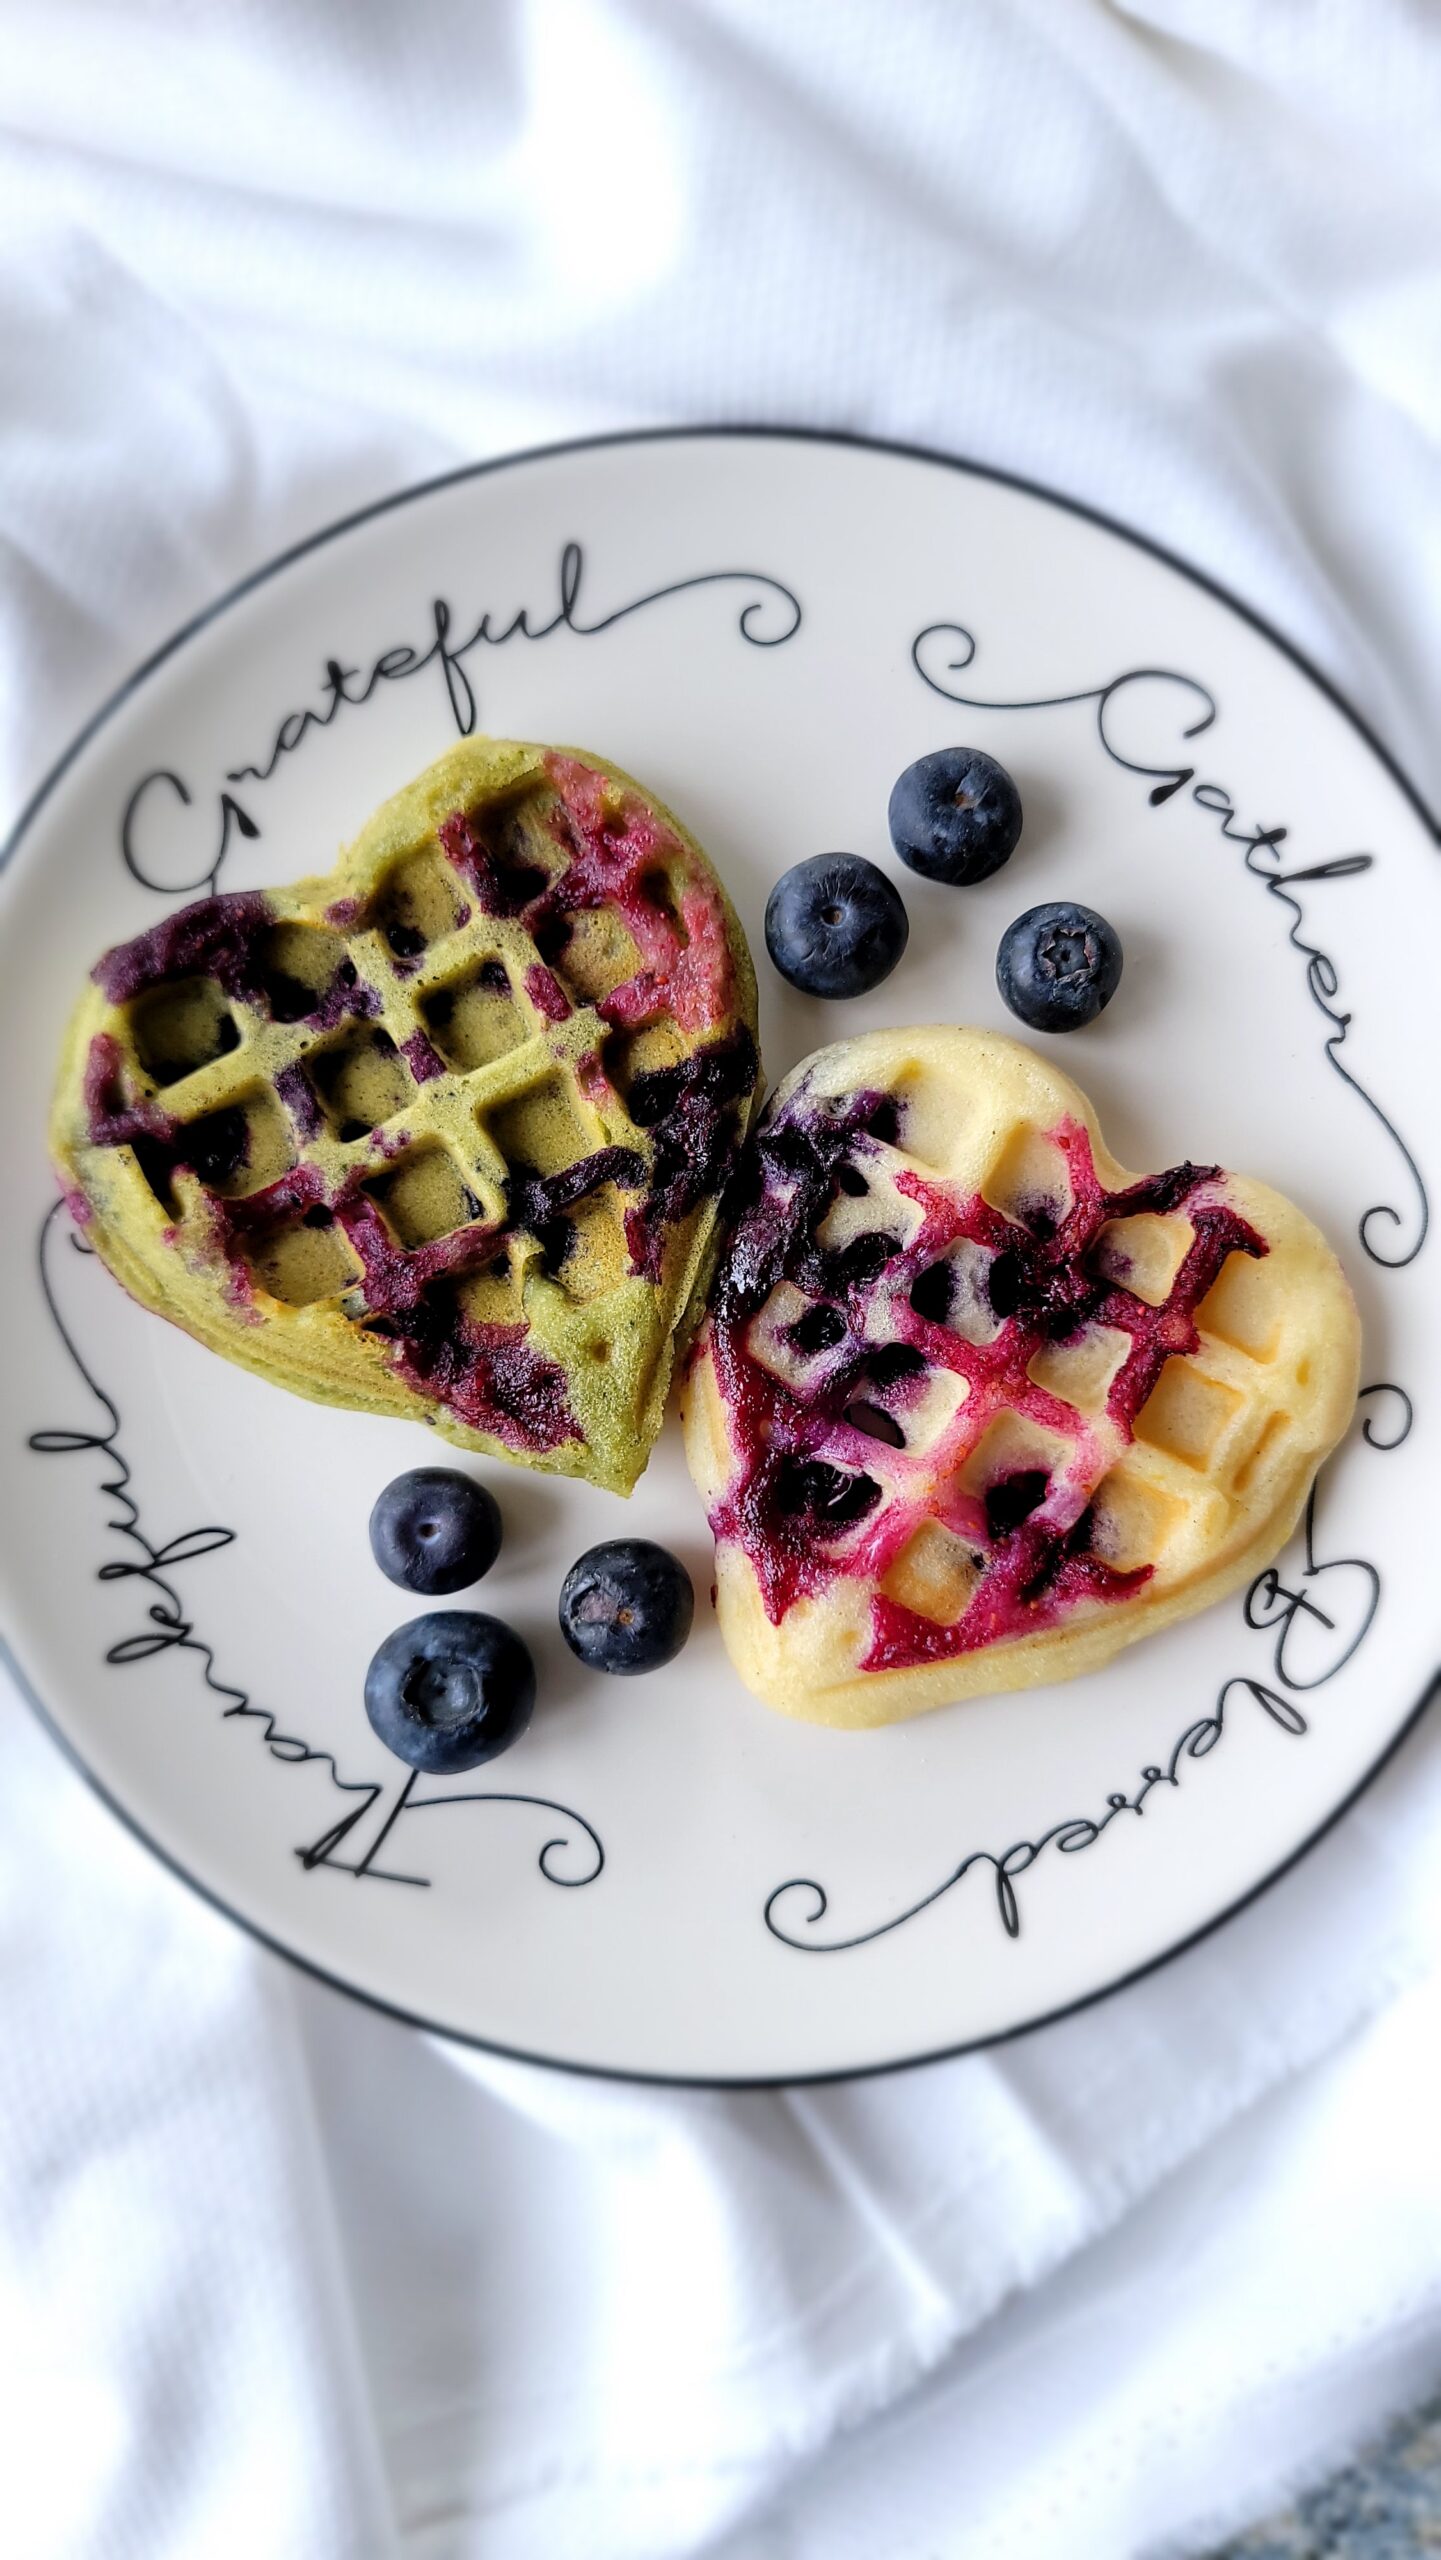
I wanted them to be beautiful. Kind of like the flowers I saw and had to take a picture of!!!
Making the Butterfly and Flower Eggs
I wasn’t satisfied with the uber-simple eggs in the reel, so I set out to make them better.

So they’d look like this.
Getting the right molds for the eggs
After significant time searching for the original silicone mold (I absolutely couldn’t find it), I did some shopping on Amazon and Temu and came up with some great alternatives. I’ll link them below.

These are the ones I used for the small butterflies and flowers. Object in image are smaller than they appear 😉
The biggest problem I had was getting a good feeling for how large the mold cavities were going to be. One of my favorite molds had much smaller openings, which would be a problem for standard large eggs.
Getting the right eggs for the molds
Once I had a selection of molds, getting the right sized eggs had the potential to be a problem. For the smaller mold, I figured finding “small” sized eggs would work. It turns out that “small” sized eggs aren’t all that small.

The “small” sized eggs were even too large for my favorite mold. I ended up switching to quail eggs, and they were the perfect size.
Plan B. Quail eggs.
I ended up Instacart ordering quail eggs which are very very small eggs. I’ve used them before in recipes that need to be topped with a small fried egg. Like mini truffle burgers with mushroom buns. Just saying.

It turned out that quail eggs were exactly the right size for the mold, and the flowers and butterflies ended up being absolutely breathtaking.

Butterfly and Flower Eggs. The quail eggs were the perfect size. I even made the “Best Mom” out of colored and plain egg whites.
Cooking the eggs for the right amount of time
This is where the challenge comes in. Depending upon the temperature of the eggs (room temp), the quality of your skillet, how tightly your lid fits on said skillet, and how much/hot the simmering water is, the cooking time can vary.
Here is an estimate that I came up with for slightly soft eggs. If you like your eggs more well done (actually better for unmolding the smaller eggs) then disregard these times.
- Quail eggs in small molds: around 2.5 minutes
- Large eggs in larger molds: around 6-8 minutes depending…
I even made some larger butterfly and flower eggs using a larger “muffin” sized mold and standard size large eggs.

You can see the difference in size between the small quail eggs and the larger ones.
Painting the egg molds
One of the upgrades I wanted to make to the molded eggs was adding some color. The way I managed that was to separate a large egg, then place the egg white in several small bowls and color each one a different color. Using really small paint brushes, I carefully painted the inside of the (greased) cavities with the colored whites. The yolk didn’t go to waste, it was used for painting yellow in the molds.
After painting, I carefully added the egg over the color. After it cooked the butterflies were a wonderful watercolor, and the flowers had bright yellow centers.

This is what the painted mold looks like. The paint is egg white and food coloring and egg yolk.
Here’s the “Recipe” for Painted Butterfly and Flower Eggs – An Eggs – traordinary Mother’s Day Breakfast
I love how gorgeous these eggs look. Keep in mind that you can actually make them in any shape depending upon the molds you purchase. If you want to make the eggs using large eggs make sure to purchase “muffin” sized molds.
Print
Butterfly and Flower Eggs An Eggs – traordinary Mother’s Day Breakfast
- Prep Time: 45 minutes
- Cook Time: 15 minutes
- Total Time: 60 minutes
- Yield: 8-16 small or 6-12 large Butterfly and Flower Eggs 1x
- Category: Breakfast
- Method: Cooking
- Cuisine: Gluten Free
- Diet: Kosher
Description
The most un- eggs -pected Mother’s day starts with the eggs – ceptional, eggs-traordinary Butterfly and Flower Eggs! With a little effort, eggs and molds you can make a most eggs-tra breakfast for Mom and that’s no eggs-aturation.
Ingredients
Additional Ingredients and tools for both sized Butterfly and Flower Eggs
- 1 large egg, room temperature
- assorted gel foo coloring
- toothpicks
- propellant free nonstick spray
- food safe paint brushes
- Large 10 to 12-inch skillet with a lid
- Pointed tip/tapered offset spatula
- Garnish for the plate, parsley and chives for example
- Salt, black pepper or any other seasoning Mom loves
If using the smaller molds
- 16 quail eggs, room temperature
If using the larger molds
- 6-12 large eggs
Instructions
To Start
- Separate the large egg. Place the yolk in a small cup. Divide the egg white into several small containers, depending upon the number of colors you’d like to use.
- Using a toothpick add food coloring to each egg white and stir until the color is completely blended.
- Spray each mold cavity with nonstick spray.
- Using small food safe paint brushes, paint the bottoms of the cavities with the colored egg white. You can use the egg yolk for the color yellow, just make sure to mix it before using.
- While painting the molds, fill the skillet around 1/4-1/3 of the way up with water – around 1/2-3/4 of the height of the molds. Bring to a boil, then reduce the temperature to low/simmer.
- Crack an egg into a small cup, and carefully transfer to the mold, trying not to move the colors on the bottom. Repeat with the remaining eggs/molds.
- Carefully transfer the mold to the skillet, making sure to center the mold and that the water isn’t too high and overflowing the mold.
- Immediately cover and simmer for around 2 1/2 minutes for quail eggs and 6-8 minutes for large eggs. The time will depend on the temperature of the eggs and how well done you’d like them to be.
- Uncover the skillet and remove the mold to a heat resistant surface. Allow the eggs to rest for 2-3 minutes.
- Slowly run the tapered spatula around the edges of the eggs. If you don’t have a spatula, just jiggle the molds slightly to detach the eggs from the sides.
- Place a large plate over the mold, and in one motion, flip the mold over onto the plate. Gently press down on each flower/butterfly to unmold the eggs.
- Garnish a plate then artistically place the eggs onto the plate. Sprinkle with salt, pepper or other spices.
- Serve your egg-static Mom.
Equipment
 Buy Now →
  Buy Now →
  Buy Now →
Chosen Foods 100% Pure Avocado Oil Spray
Buy Now → Buy Now →
  Buy Now →
  Buy Now →
  Buy Now →
GreenPan Valencia Pro Hard Anodized Healthy Ceramic Nonstick 11″ Frying Pan Skillet
Buy Now →
HexClad 12 Inch Hybrid Nonstick Frying Pan and Tempered Glass Lid
Buy Now →
Lenox 6083380 Butterfly Meadow Monarch Dinner Plate
Buy Now → Buy Now →
  Buy Now →
  Buy Now →
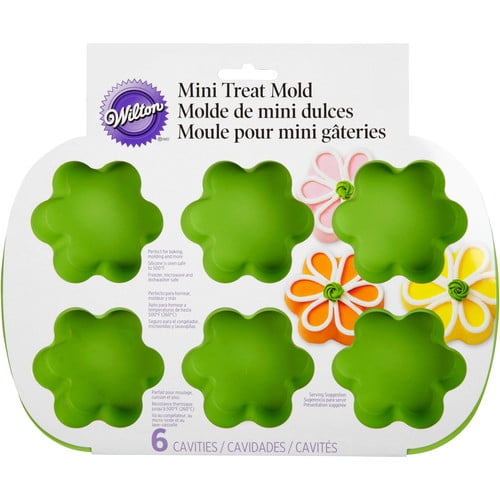
Wilton 6-Cavity Mini Silicone Mold, Flower 2105-4825
Buy Now → Buy Now →
  Buy Now →
  Buy Now →
  Buy Now →
 Notes
You can make these eggs in any shape, size or color. Just make sure to match the size of the egg with the size of the mold cavity.

This post is in memory of my Dear Mother, Yenta bas Shmuel Nechemia.

More Marvelous Mother’s Day Recipes

CHECK OUT THE KOSHER EVERYDAY AMAZON INFLUENCER STOREFRONT!
I’m excited to announce the launch of my brand, spankin’ new, Amazon Influencer storefront. The purpose of this store is to share with you all of my favorite tools, ingredients and accessories that I use on Kosher Everyday. If there’s something you’d like to see please let me know and I’ll make sure to add it. I’m updating the storefront all the time. You can find all my Cookware and Bakeware including ones like the HexClad 14 Inch Hybrid Stainless Steel Frying Pan with Lid, Stay-Cool Handle – PFOA Free, Dishwasher and Oven Safe, Non Stick with lid on my storefront.

HexClad 14 Inch Hybrid Stainless Steel Frying Pan with Lid, Stay-Cool Handle – PFOA Free, Dishwasher and Oven Safe, Non Stick
I’ve put together a complete Gluten Free Challah Storefront with everything you need to make fabulous Gluten Free Challah!Additionally there is a Small Appliance Storefront with many awesome small appliances that I recommend for your kitchen…even if you have a small space!
You can also find awesome Decorative Serving and Kitchen Items right here.
I’d love to hear what you think!

FOLLOW ME!
Don’t forget to follow Kosher Everyday on Instagram @koshereveryday! and on Facebook You don’t want to miss all the fun and interesting posts and reels that can be found nowhere else!
You can find reels showing how to make most of my recipes on Instagram!
Also, make sure to tag @koshereveryday when you make Kosher Everyday recipes! I LOVE to see your creations!!!
Please note that this post contains affiliate links. Thanks for your ongoing support!
Make sure to follow Kosher Everyday on Facebook and Instagram so you don’t miss the latest and greatest Passover recipes and fun from Kosher Everyday!
What a beautifully crafted breakfast idea—truly eggs-tra special! Perfect way to show love and appreciation on Mother’s Day. The thoughtful details and delicious touches really make it a celebration she won’t forget!
Thanks SO much Derek! All the best, Sharon