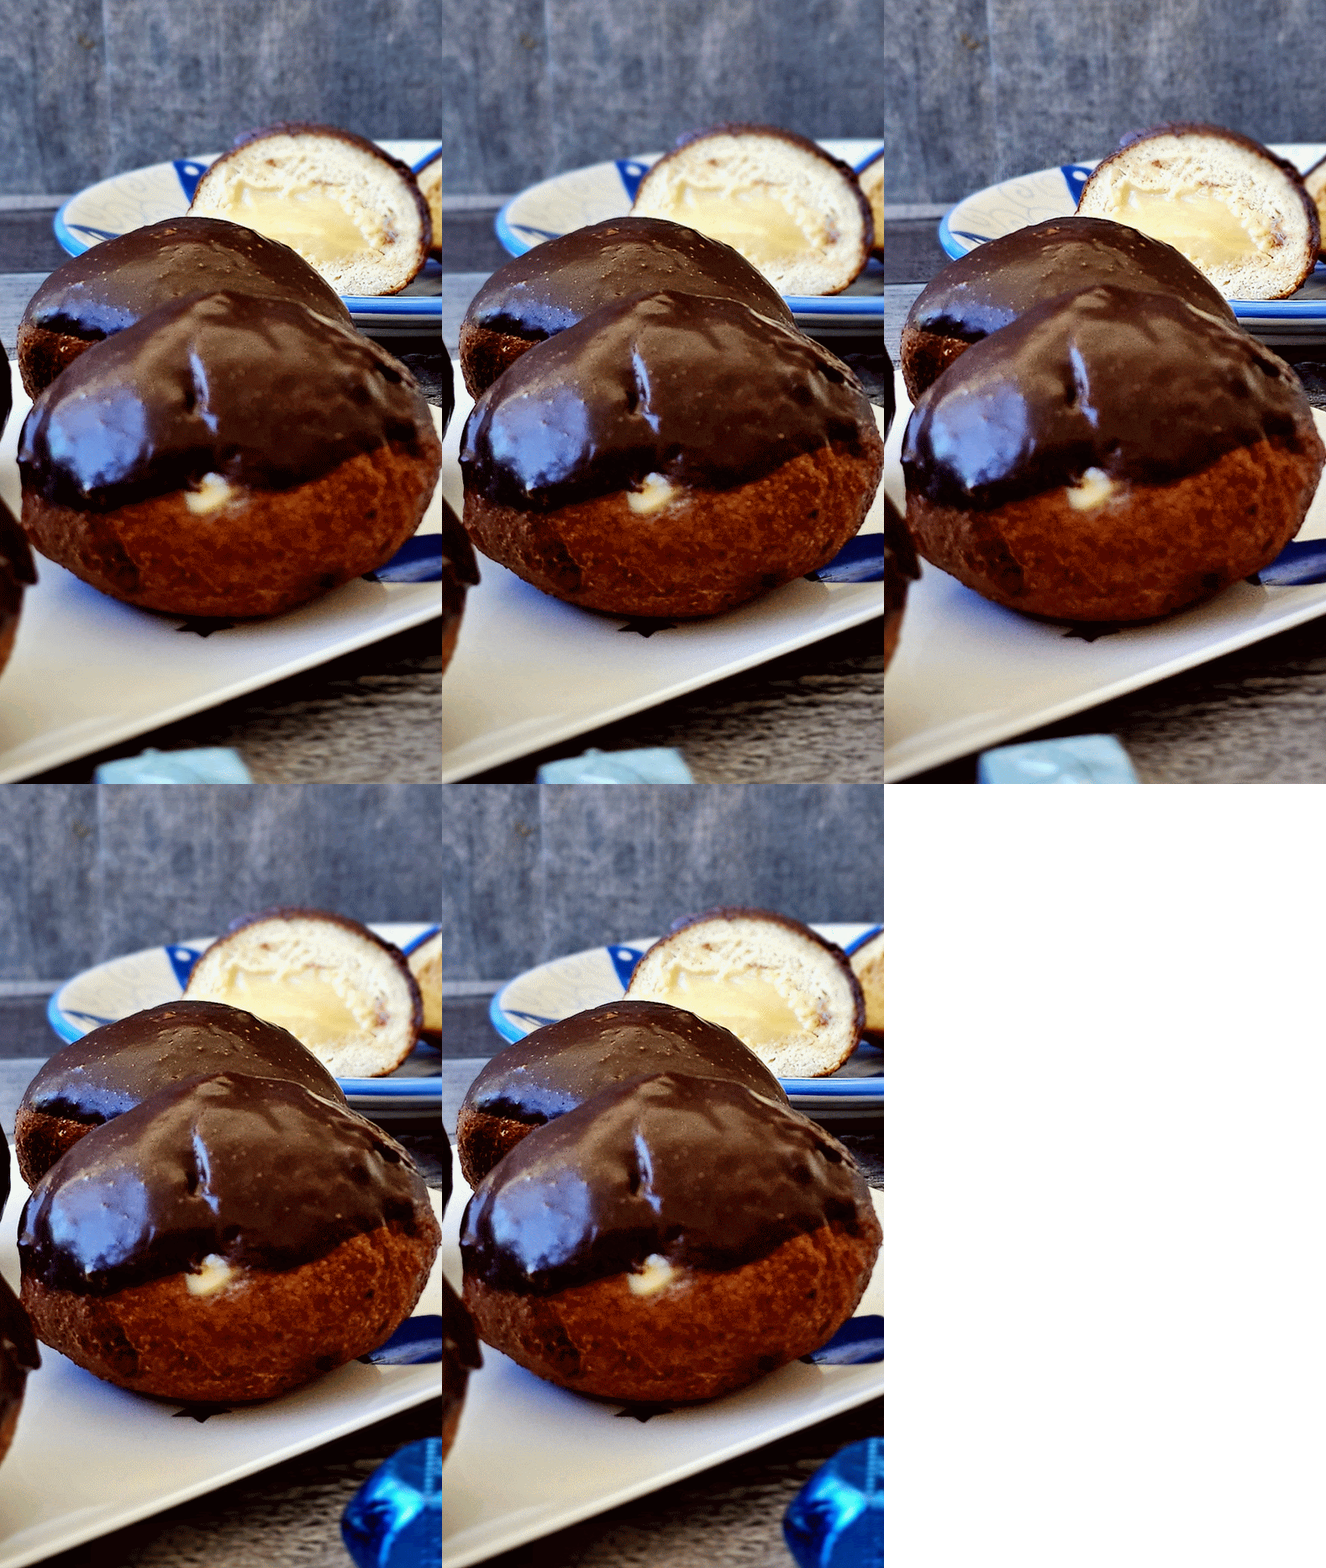
The Gluten Free Boston Cream Donuts. They’re soft and fluffy yeast donuts filled with creamy rich custard cream and topped with a smooth, fudgy chocolate glaze. The combination of the soft dough, creamy filling, and chocolate topping creates a treat that is decadently indulgent. They’re the perfect fried bakery donuts…and they’re gluten free!!!
Gluten Free Boston Cream Donuts
My favorite donuts of all time are Boston Cream Donuts. They’re soft and fluffy yeast donuts filled with creamy rich custard cream and topped with a smooth, fudgy chocolate glaze. The combination of the soft dough, creamy filling, and chocolate topping creates treats that are decadently indulgent. They’re the perfect fried bakery donuts.
But…the challenge is making them not only gluten free, but deliciously gluten free.

OMG! OMG! OMG! Yes…they taste as good as they look!!!
The recipe for Gluten Free Boston Cream Donuts
I can take no credit for this recipe except to clarify some of the steps and make them dairy-free. It is 100% from The Loopy Whisk – a website/Instagram site that is gluten free. I personally think The Loopy Whisk is one of the all time best gluten free baking sites EVER.
So…when a saw an Instagram post from The Loopy Whisk for Gluten Free Boston Cream Doughnuts a while back I knew that I was going to make them for Chanukah.
The website description is great with a lot of advice on how to make them, as well as helpful substitutions. I’m going to link you directly to the site for that information. This is just a description of my experience and I’m going to share the recipe with you giving credit where credit is due.
The only modifications I made to the recipe are: It is now completely dairy-free and the instructions have changed in certain places. Feel free to go to the original recipe for the original instructions.

The Loopy Whisk Boston Cream Doughnuts – click on the image for the link to the recipe from the site.
Making Gluten Free Boston Cream Donuts
WARNING: THIS RECIPE IS AN OFFICIAL PATCHKE BUT IS TOTALLY WORTH IT!
There are a lot of steps required to make these donuts. If you love Boston Cream Donuts and your family does as well, I recommend doubling the recipe as the original recipe only makes 8 donuts.

The recipe makes eight donuts (one for each night of Chanukah)! They’re so good you just might want to make a double recipe!
STEP 1: Making the Pastry Cream/Custard filling
So…I strongly recommend making sure that your almond milk isn’t spoiled before making the pastry cream and donuts. Otherwise you’ll have a situation where you, and your Dear Daughter-In-Law, are wondering why the donuts seem fizzy and taste slightly weird when you’re eating them.

I ended up making another batch and those were absolutely incredible!!!
I have some experience making pastry cream, and while I’ll use the recipe from The Loopy Whisk for Vanilla Pastry Cream, I am changing the steps to make it the way I always do. I like that method better.
Additionally, if you just cool the cream in a bowl of ice water and cover it with plastic until the donuts are ready to be filled, it works best.
STEP 2: Making the Donut Dough
Making the donut dough actually wasn’t that complicated except for the fact that there were several ingredients that you need to make sure you have in stock before starting the recipe. Those include:
- active dry yeast
- whole psyllium husk
- tapioca starch
- millet flour
- sorghum flour
- xanthan gum
I actually keep the yeast, psyllium husk, tapioca starch and xanthan gum in my pantry but had to buy millet flour and sorghum flour specifically for these donuts. Once you have all the ingredients it’s a pretty straight forward recipe.
Kat (from The Loopy Whisk) strongly recommends weighing the ingredients, and I agree. I did make one batch weighing the ingredients and one where I just measured and they were both very good. The one where I just measured were slightly more dense than the weighed batch, but both were excellent.
STEP 3: Letting the Donuts rise
This is a trick I use when making my Gluten Free Challah…I form the dough into the shape then let them rise. Unlike traditional yeast doughs, there is no gluten strands you’re trying to work by kneading, so any leavening that’s done by the yeast or baking powder will die if you re-knead them after they rise.
Trust me on this.
STEP 4: Frying the Donuts
The original recipe uses sunflower oil and recommends using an oil that’s neutral in flavor and has a high smoke point. I like to use peanut or avocado oil as both are readily available and have a high smoke point and neutral flavor.

Unglazed Boston Cream Donuts. When you use a neutral oil with a high smoke point you can fry the donuts at a higher temperature cooking them more quickly so they get golden brown and absorb less oil.
Step 5: Filling the Boston Cream Donuts
I recommend getting a pastry filling tip. They have sets on Amazon that are really great. Here’s an example:
Using a kit like this makes filling the donuts super simple. I usually take a very tall cup and fold the ends of the bag over the edge. That supports the bag and makes it easy to fill.
The purple things that come with the kit are bag ties. You wrap them around the bag (not in the hole of the purple thing but wrap the whole purple thing around) and they keep the filling from splorting out of the bag when you squeeze it.
It’s a great kit in general.
Step 6: Glazing the Boston Cream Donuts
Boston Cream Donuts always have a chocolate glaze on top. This recipe uses a simple ganache made from just cream and chocolate. The trick to making a smooth and shiny ganache is to heat the cream first until it’s hot, then add the chocolate without stirring but covered with the cream. After a few minutes, whisk the chocolate, which is mostly melted, until it’s completely smooth.
I started out by using an offset spatula to coat the donuts with chocolate, then realized it was way easier to just dip the tops of the donuts into the chocolate.

I found that dipping worked better than spreading the glaze with an offset spatula.
STEP 7: Eating the Gluten Free Boston Cream Donuts
This one is self explanatory!

Does anything really need to be added here?
Here’s the recipe for Gluten Free Boston Cream Donuts
Recommendations: Follow the instructions.
Gluten Free Boston Cream Donuts
- Prep Time: 1 hour 15 minutes
- Cook Time: 15 minutes
- Total Time: 1 hour 30 minutes
- Yield: 8 Gluten Free Boston Cream Donuts 1x
- Category: Dessert
- Method: Frying
- Cuisine: Gluten Free
- Diet: Kosher
Description
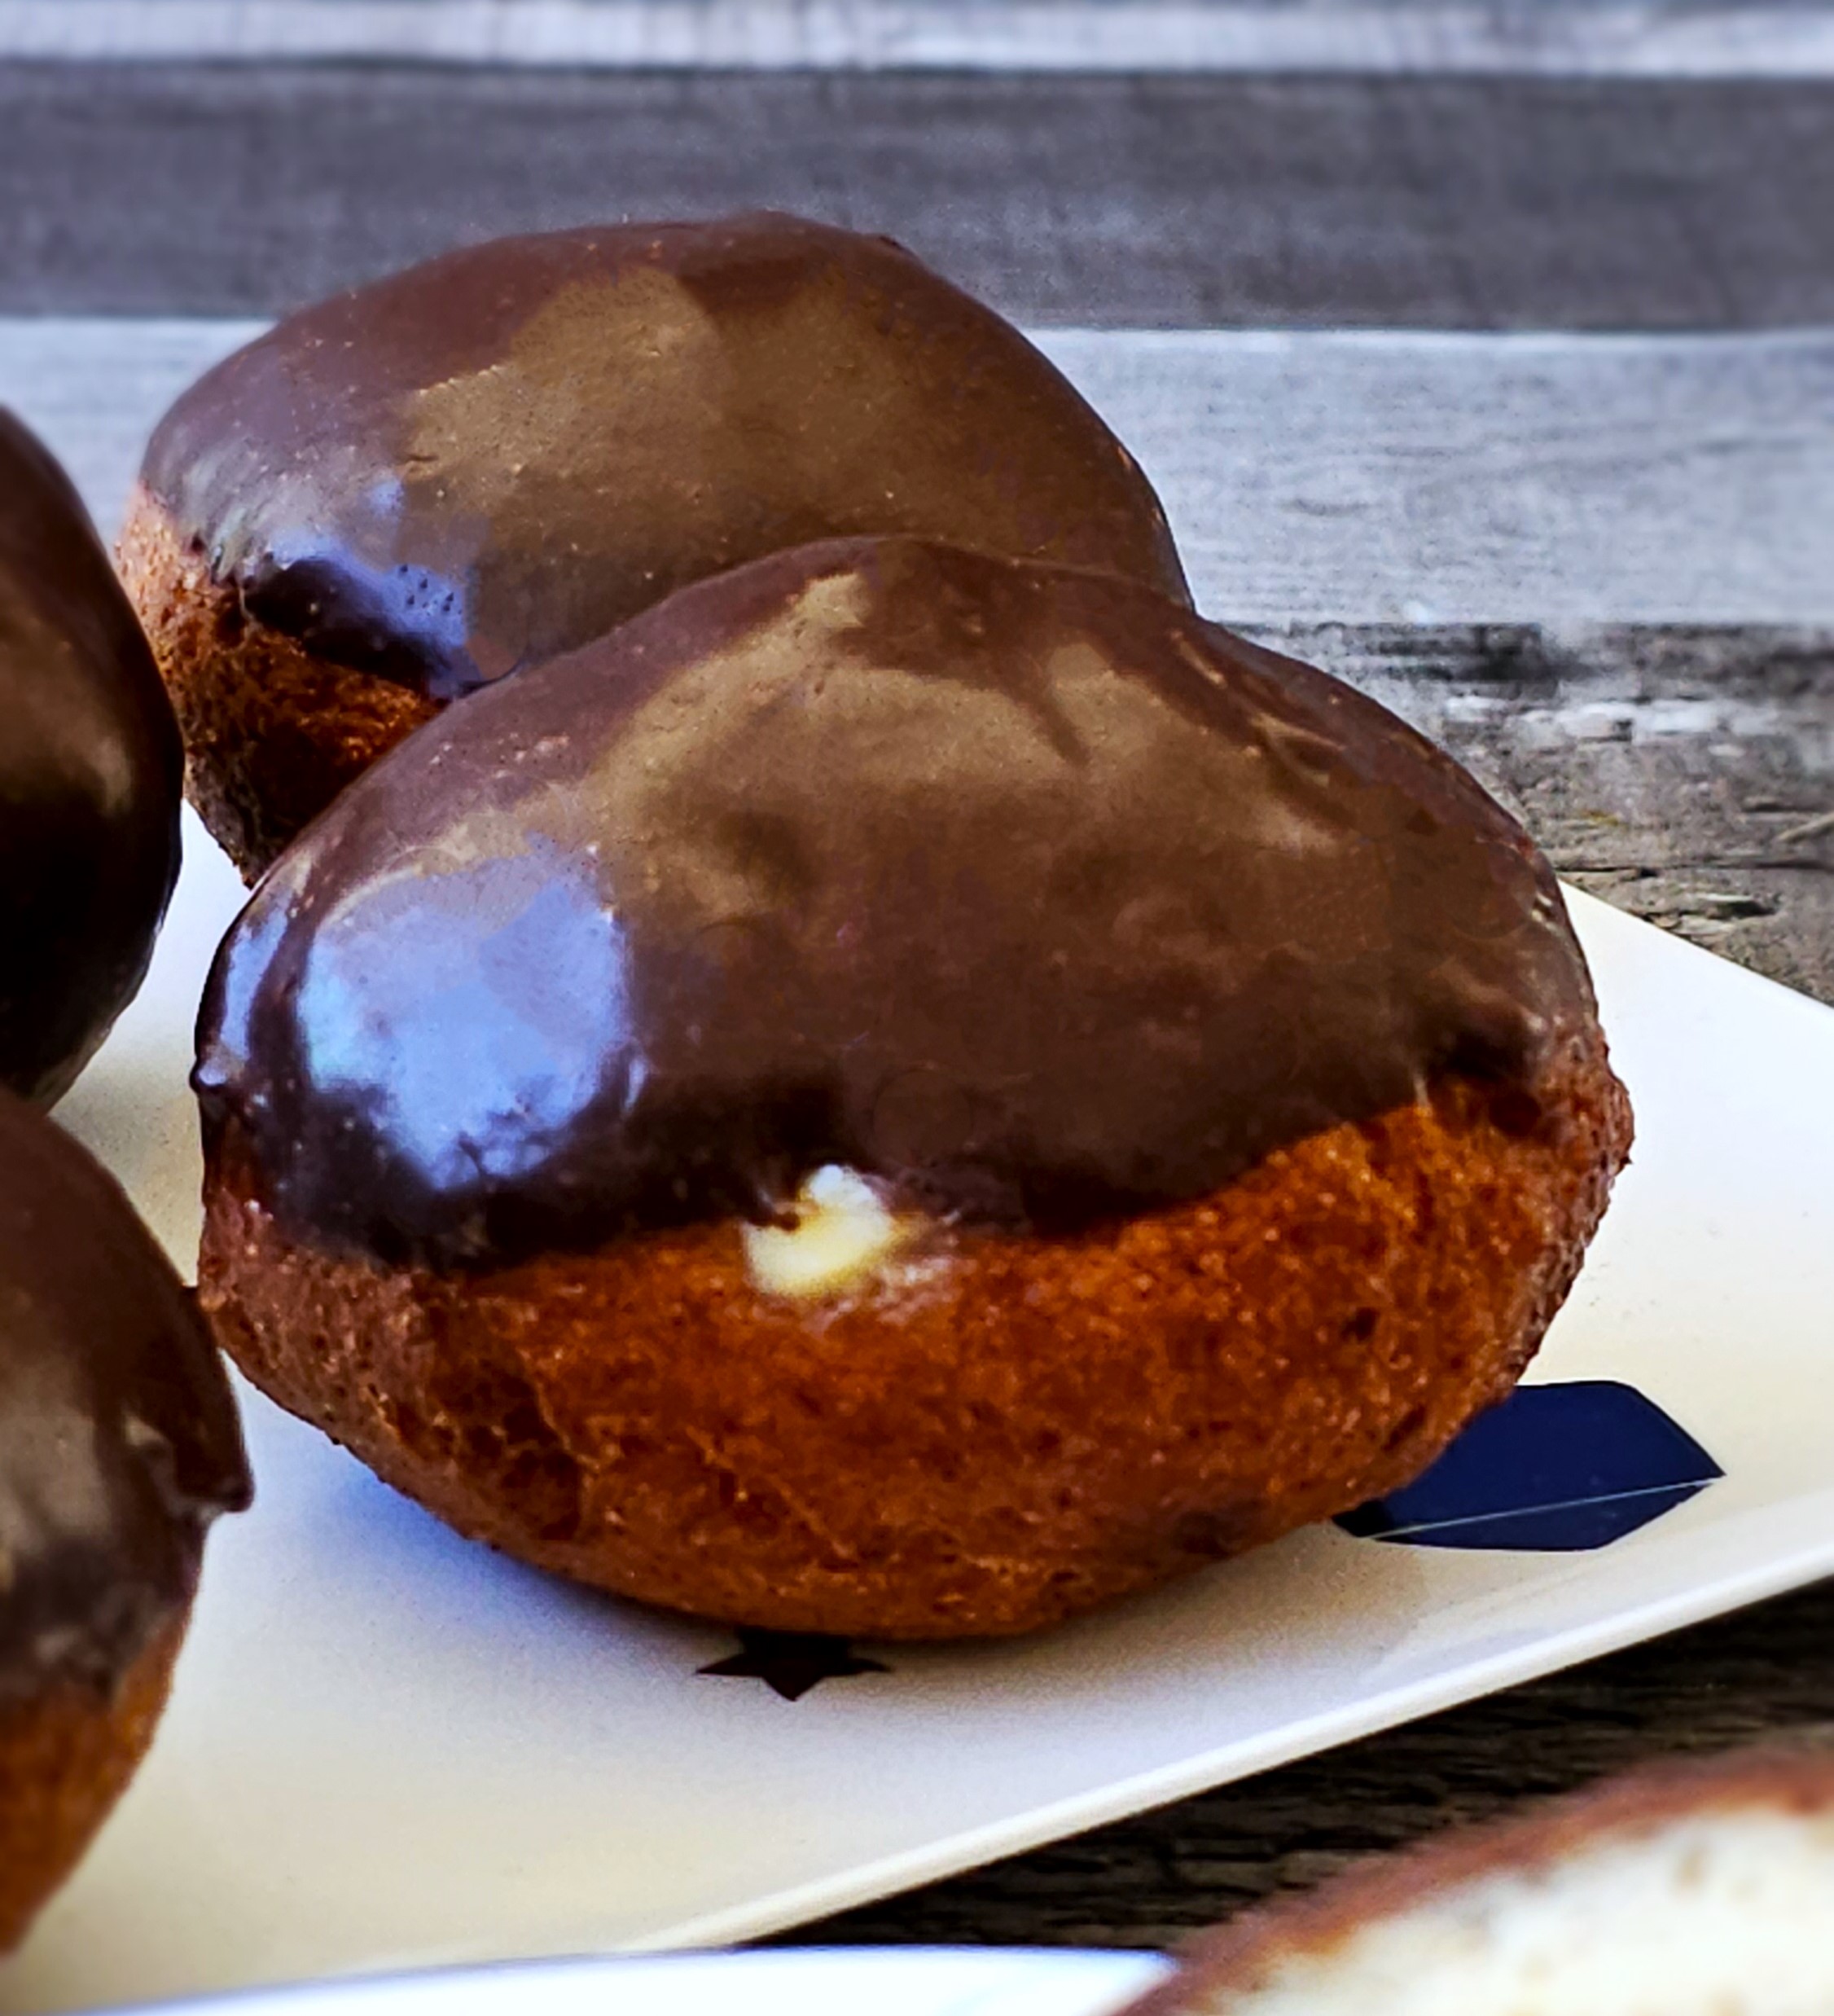
The Gluten Free Boston Cream Donut. It’s a soft and fluffy yeast donut filled with creamy rich custard cream and topped with a smooth, decadent chocolate glaze. The combination of the soft dough, creamy filling, and chocolate topping creates a treat that is decadently indulgent. It’s the perfect fried bakery donut…and this one is gluten free!!!
This recipe is 100% taken from The Loopy Whisk Gluten Free Boston Cream Doughnuts and Pastry Cream. I made this recipe dairy free and some of the instructions may have changed slightly.
Ingredients
For the Pastry Cream (donuts use 1/2 a recipe – see note)
- 2 cups almond milk, divided
- 4 teaspoons pure vanilla extract
- 6 large egg yolks, room temperature
- 3/4 cup granulated sugar, divided
- 6 tablespoons corn starch
- 4 tablespoons plant based butter, cubed
For the Donut Dough
- 10g (2 1/2 teaspoons) active dry yeast
- 50g (1/4 cup) granulated sugar, divided
- 90g (1/3 cup+2 teaspoons) almond milk, warm
- 10g (2 tablespoons) whole/rough psyllium husk (if using psyllium husk powder, use only 8g)
- 140g (1/2 cup+4 teaspoons) cold water
- 160g (1 1/3+1 tablespoon) tapoca starch
- 130g (3/4 cup+3 1/2 tablespoons) millet flour
- 25g (3 tablespoons) sorghum flour
- 5g (2 teaspoons) xanthan gum
- 5g (1 teaspoon) kosher salt
- 8g (2 teaspoons) baking powder
- 1 large egg, cold from the refrigerator
- 35g (2 1/2 tablespoons) plant based butter, softened
- neutral, high smoke point oil for frying
For the Chocolate Ganache Glaze
- 80g (2 3/4 ounces) good quality chocolate chips
- 120g (1/2 cup) dairy-free heavy whipping cream
Instructions
For the Pastry Cream
- Prepare and ice bath. Add ice to a large mixing bowl (large enough to hold the medium sauce pan), then add enough water to cover the ice. There should be enough water/ice to reach halfway up the sauce pan when the pan is placed in the water.
- In a medium bowl or four cup measuring cup, whisk together the corn starch and 1/4 cup sugar. Add 1/2 cup almond milk and whisk until smooth.
- Whisk in the egg yolks until completely blended. Set aside.
- In a medium sauce pan, heat 1 1/2 cups almond milk and 1/2 cup sugar, whisking until sugar is completely melted int the milk.
- Pour a small amount of the hot sugar milk into the egg mixture, whisking constantly, until the milk is completely blended. This is called tempering and keeps the eggs from scrambling when added back into the hot sugar milk.
- Slowly pour the tempered eggs into the remaining hot sugar milk, whisking constantly, until the mixture is completely blended.
- Cook over medium heat, whisking constantly until the mixture begins to bubble. Cook for another minute then remove from the heat and whisk in the vanilla and butter until smooth.
- Immediately transfer the pastry cream to the ice bath and whisk until the cream starts to cool. Press plastic wrap onto the top of the pastry cream and set aside.
- Pastry cream can be made up to a day in advance and stored tightly wrapped in the refrigerator.
For the Donut Dough
- In a small mixing bowl, whisk together the yeast, 1 tablespoon (10g) of sugar and the warm milk. Set aside to proof.
- In another small mixing bowl, whisk together the psyllium husk and the cold water. After around half a minute it will form a gel. Set aside.
- In the bowl of a stand mixer, whisk together the tapioca starch, millet flour, sorghum flour, santhan gum, salt and baking powder.
- Form a well in the middle of the dry ingredients and add the egg, proofed yeast and psyllium gel.
- Using a dough hook, mix the ingredients until they start to form a sticky dough. Use a rubber spatula to occasionally scrape along the sides and bottom of the bowl to prevent any unmixed ingredients.
- Add the plant based butter and mix until completely blended to create a soft dough.
- Chill the dough for 1-2 hours to allow the plant based butter to set and make the dough easier to handle (see note).
- Cut the dough into 8 even pieces (you can weigh them to make sure they are even) and form into donut shapes, pressing down slightly to flatten a little.
- Place the shapes on a lightly greased baking sheet and cover loosely with plastic wrap. Allow the donuts to rise for 1 – 1 1/2 hours in a warm location (see note).
- Cover a wire rack with paper towels. Set aside.
- Add at least 2-inches of oil to a medium/large sauce pan or deep fryer. Heat the oil to 320°F-330°F and try to maintain this temperature throughout the frying process with a candy thermometer.
- Fry the donuts in batches, until golden brown on each side around 2 1/2 minutes per side.
- Use a slotted spoon to remove the donuts and place them on the prepared wire rack. Make sure to drain them as much as possible before transferring to the rack.
- Allow the donuts to cool until lukewarm before filling.
To Fill the Donuts
- You can make a small hole in the donuts if you like using a paring knife or scissors before filling. This makes filling them a little easier.
- Re-whisk the pastry cream to make sure it’s completely smooth.
- Snip a small hole in a pastry bag and place the pastry tip into the bag, pushing the tip as far down as it will go and is tightly in the hole.
- Using a tall cup or glass, place the pastry bag in the cup and fold the edges of the bag over the rim of the cup. Spoon pastry cream into the bag until it’s around halfway filled. Unfold the bag from the cup and twist the bag to seal.
- Place the tip of the pastry bag into the center of the prepared donut and pipe cream into the donut until cream starts to come out of the hole.
- Repeat with the remaining donuts.
For the Chocolate Ganache Glaze
- Place the cream in a small microwave safe bowl of measuring cup. Microwave for one minute to heat. You can also place the cream in a small saucepan and heat over medium heat until simmering.
- Add the chocolate all at once and swirl the cup/pan to coat the chocolate. Allow the chocolate to rest for one minute.
- Whisk the mixture until smooth and glossy.
- Dip the warm donuts almost halfway into the glaze. Place on a wire rack to set.
- Serve slightly warm or within an hour of frying for best results. They can also be stored in the refrigerator in an airtight container but they will definitely not be as good.
Equipment
 Buy Now →
Amazon Brand – Happy Belly Peanut Oil, 1 gallon
Buy Now →
Country Crock Plant Butter with Avocado Oil Sticks
Buy Now →
Konhard Stainless Steel Hand Whisk 6-inch
Buy Now →
OXO Good Grips 11-Pound Stainless Steel Food Scale with Pull-Out Display
Buy Now →
Escali Rondo Contemporary Kitchen Bowl Scale 2-Quart
Buy Now →Notes
The original recipe calls for 1/2 a recipe of pastry cream. I say make a whole batch (which is what I’m including) and eat the rest with a spoon. If you really want to be a little healthier, pastry cream is great on fruit or in a fruit tart.
It’s best to weigh the ingredients. In the event that you don’t have a scale (although you should!) you can measure out the ingredients. Weighing is best and most accurate.
For one of my batches of donuts I did not refrigerate the dough and it didn’t effect the result. I did let the dough rest for a little while before forming the donuts, but because I was using plant based butter instead of dairy butter, the setting of the butter wasn’t as essential. I also think that because I was using plant based butter the dough wasn’t as sticky as it might have been. Chill or not chill – up to you, but do let the dough rest for at least 10 minutes to allow the dry ingredients time to hydrate.
I used the proof setting on my oven. Basically I set the oven to 100°F bake (proof mode) and put the plasic covered pan into the oven to proof the donuts. It works increidbly well.
Nutrition
- Serving Size:
- Calories: 350
- Sugar: 22 g
- Sodium: 372.1 mg
- Fat: 15.4 g
- Saturated Fat: 7.2 g
- Carbohydrates: 48.1 g
- Fiber: 3.2 g
- Protein: 5.5 g
- Cholesterol: 100.9 mg
Keywords: Gluten Free Donuts, Fried Donuts, Gluten Free Cream Donuts, Gluten Free Boston Cream Donuts, Gluten Free, Gluten Free Donut Recipe, Pareve, Dairy Free, Meat Free, Vegetarian, Chanukah, Chanuka, Hanukah, Hanukkah

Here’s How I Made The Gluten Free Boston Cream Donuts on Instagram @koshereveryday
View this post on Instagram
More Delightful Donut and Fried Chanukah Recipes!

CHECK OUT THE KOSHER EVERYDAY AMAZON INFLUENCER STOREFRONT!
I’m excited to announce the launch of my brand, spankin’ new, Amazon Influencer storefront. The purpose of this store is to share with you all of my favorite tools, ingredients and accessories that I use on Kosher Everyday. If there’s something you’d like to see please let me know and I’ll make sure to add it. I’m updating the storefront all the time.
You can find all my Cookware and Bakeware including ones like the HexClad 14 Inch Hybrid Stainless Steel Frying Pan with Lid, Stay-Cool Handle – PFOA Free, Dishwasher and Oven Safe, Non Stick with lid on my storefront.
HexClad 14 Inch Hybrid Stainless Steel Frying Pan with Lid, Stay-Cool Handle – PFOA Free, Dishwasher and Oven Safe, Non Stick
I’ve put together a complete Gluten Free Challah Storefront with everything you need to make fabulous Gluten Free Challah!
Additionally there is a Small Appliance Storefront with many awesome small appliances that I recommend for your kitchen…even if you have a small space!
You can also find awesome Decorative Serving and Kitchen Items right here.
I’d love to hear what you think!
FOLLOW ME!
Don’t forget to follow Kosher Everyday on Instagram @koshereveryday! and on Facebook You don’t want to miss all the fun and interesting posts and reels that can be found nowhere else!
You can find reels showing how to make most of my recipes on Instagram!
Also, make sure to tag @koshereveryday when you make Kosher Everyday recipes! I LOVE to see your creations!!!
Please note that this post contains affiliate links. Thanks for your ongoing support!





Leave a Reply