Passover. A time of redemption. Exodus. Freedom. Liberation. By the time Pesach is over, although I’m super happy with having spent time with our family and friends (all 120+ of them), I’m pretty tired. By the time the kitchen is sort of back to it’s pre-chametz status I’m blitzed. Tired. Wiped. The “E” word (the “E” word is a restricted word in our family, only to be brought out under extreme circumstances due to frequent overuse of the term…ok, it’s exhausted). In all the chaos, preparation, antibiotics, and re-cleaning, I managed to begin to lose focus regarding the purpose of all the prep. I needed some Spiritual Kneading!
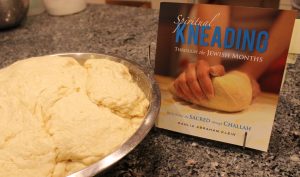
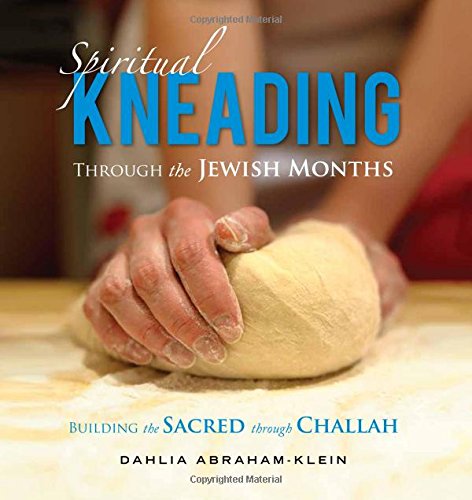
A while before Pesach I received the book “Spiritual Kneading Through the Jewish Months – Building the Sacred through Challah” by Dahlia Abraham-Klein. I put it to the side with the intention of reviewing it after the chag when things weren’t quite so crazy. So, last week, I made a much needed cup of coffee, grabbed a pencil, highlighter, post-its and made my way to the Lazy-Boy recliner, put my feet up and started to read. THANK YOU DAHLIA!!!
The book begins with a beautiful description of the concept of the first Mitzvah, to mark/sanctify the months of the year. Dahlia then eloquently brings you into the celebration of a Jewish woman’s role in this important mitzvah, then ties it into the very important mitzvah of taking/baking Challah.
While the writing is incredibly beautiful, there is a lot of practical information in this book as well. I was blessed to be able to do a Challah Braiding class last week for Chai Lifeline here in Chicago. I came prepared with my Spiritual Kneading book in hand. With it, I was able to give clear explanations for most of the questions that the group had. I also had the brachot, tehillim, and mitzvah specifics handy.
Spiritual Kneading is also a guide for Rosh Chodesh Challah groups, with Jewish Monthly themes, challah recipes, and braiding tips. As a guide for groups, it’s excellent. It’s also fun to have a new, seasonal/holiday theme ready to prepare.
I was very excited to try recipes after reading the rest of the book. I tried the basic Egg Challah recipe – pretty straightforward. I ended up having to add a little extra water, but once I did the dough was smooth and elastic . I’m a little lazier and use my mixer to knead, so I probably didn’t get all the spiritual infusion or exercise I might have had I kneaded the dough completely by hand. Also, in the interest of full disclosure, my plan had been to make the dough early in the morning on Thursday, let it rise, braid all kinds of cool and fun challot for my demo, then bring them all baked. HA! Let’s just say that didn’t happen, and I ended up leaving a big bowl of challah dough on the counter to rise as I left for the demo. When I got back I was ready to braid! The dough was wonderful after it rose (even though it rose longer than it was supposed to). It was so nice to be able to pop open the book for the brachot and have them handy. My friend and I had a blast trying out a bunch of the cool braiding techniques in the book.
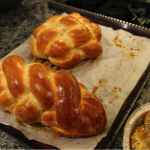
The challot were gorgeous after they baked and tasted great. They were less sweet than the challot I bake regularly, but that’s a matter of personal preference.
I would highly recommend this book for the new baker to the experienced chef. Especially for a new bride as a shower gift. It’s a great way to bring you back to the origins of why we are making challah to begin with, connecting us with our spiritual “needing” via Spiritual Kneading.
You can find “Spiritual Kneading Through the Jewish Months” on amazon.com

Egg Challah
Ingredients
Scale
- 4 tablespoons active dry yeast
- 3 cups warm water
- 3/4 cup organic sugar plus 2 tablespoons organic sugar
- 4 cage-free organic eggs
- 5 pounds organic white flour
- 1 1/2 tablespoons sea salt
- 1 cup neutral-tasting oil, such as safflower oil
- 2 cage-free organic eggs beaten
Instructions
- In a large bowl, combine the yeast with the 2 tablespoons of sugar and the warm water.
- Cover the bowl and allow the mixture to start activating.
- Yeast activation should take about 10 minutes; it will be bubbling and foamy.
- In the meantime, break 1 egg at a time into a small glass bowl and check that there are no red spots on the yolk.
- Transfer the egg into a larger bowl and, when all the eggs are cracked, beat with a fork.
- Set 1 cup of flour aside.
- Sift the remaining flour, sugar and salt into the bowl.
- Pour the eggs and oil onto the flour.
- Combine all the ingredients, using a spatula.
- When it begins to form a dough, it is time to knead.
- At this point, you can remove the dough from the bowl and knead on the kitchen counter if it’s easier for you, or knead directly in the bowl.
To knead the dough
- Grab the side of the dough furthest away from you and fold it toward yourself.
- Fold the dough in half and use your body weight to push the dough into itself.
- If you find that the dough is sticking to much to the surface and preventing you from kneading properly, dust the dough with flour.
- Give the dough a quarter turn (90 degrees).
- Grab the other side and fold it in half.
- Again, with a lot of weight behind it, push the newly folded half into itself.
- Repeat this process for 10-15 minutes, or until the dough is smooth, silky, elastic and it does not stick to the surface.
- After the dough is thoroughly prepared, lay it on the countertop while you grease the bowl with a fine layer of oil.
- Next, turn the dough in the oil several times so that the dough is greased lightly on all sides.
- Cover the bowl with a large plastic garbage bag or kitchen towel and allow it to rise for 1 hour.
- Make the blessing on hafrashat challah.
- Knead the dough again for a few more minutes.
- Use the remaining flour for the surface area and hands to prevent sticking.
- Form it into shaped loaves of your choice.
- Cover the loaves again and let them rise in a warm place for 1 hour or until the dough as doubled in volume from its original size.
- If you cannot bake the challahs immediately then this is the time to wrap the shaped dough in plastic wrap to prevent drying.
- You can store it in the coldest part of the refrigerator for up to 48 hours.
- On the day of baking, remove the dough from the refrigerator and let stand on kitchen counter until it comes to room temperature, about one hour.
- Preheat the oven to 350℉.
- Brush your challahs with beaten eggs and sprinkle with the topping of your choice.
- Bake in your preheated oven for about 30-36 minutes, or until loaves turn golden brown and shiny.
- Bread should have a nice hollow sound when thumped on the bottom.
- Remove from the oven and cool on a rack.
- Wait at least one hour before serving.
- If you are freezing the challah, wrap in waxed paper and foil.
- It can be stored in the freezer for up to 2 months.


Leave a Reply