Homemade Paneer Cheese is worth the effort!
Why I made paneer from scratch
A while back I found Kosher Paneer cheese at Costco. I did some research and found that it’s similar to Haloumi cheese in that you can dice it, brown it and it holds it’s shape.
Cool.
I ended up writing a post/recipe for my sister site Everyday Gluten Free, which I used to write for the Chicago Tribune, including paneer cheese.
I wanted to re-do the recipe for Kosher Everyday…but I couldn’t find Kosher paneer cheese nearby. There wasn’t enough time to go to Costco, and the cheese wasn’t available for delivery.
So…I made it from scratch
How to make Paneer Cheese
I did what anyone looking for a recipe does.
I Googled it.
It’s actually pretty straight forward to make paneer. All you need is three ingredients.
- Whole milk
- Lemon Juice
- Salt
You also need a cheesecloth bag, which of course I ordered on Amazon.
I used the recipe from The Kitchn – How to Make Paneer Cheese in 30 Minutes
It worked fairly well. My only error was in not having the milk hot enough when I added the lemon juice. So as per the instructions I added more lemon juice. Then I realized that the milk wasn’t quite the right color and the curds hadn’t completely separated.
So I heated it some more. That worked.
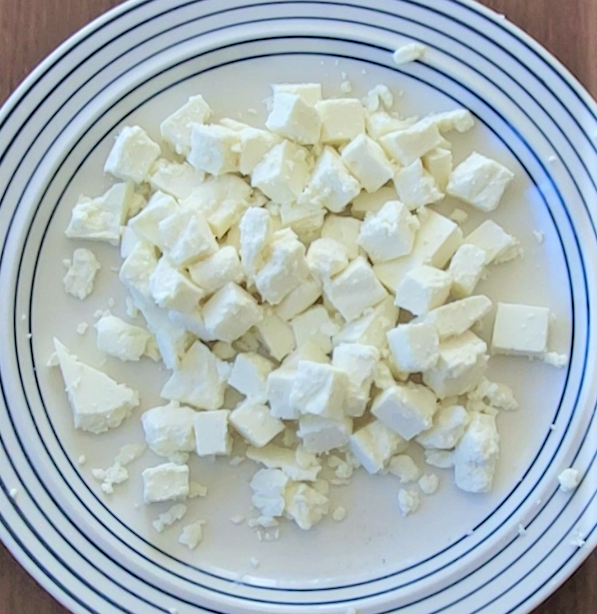
The finished product
I pressed all the liquid out of the cheese, I think I did a pretty good job. I laid the cheese filled bag on a plate, put another plate over it and then stacked a bajillion cans on top to further press the liquid out of the cheese.

Ta da! I made Homemade Paneer Cheese!
It came out great, but a little softer than the store bought paneer. It was still delicious, but while I was able to sauté it, some of it did melt.
Yum? Yum!
Here’s the recipe
Print
Homemade Paneer Cheese
- Prep Time: 10 minutes
- Press time: 60 minues
- Cook Time: 20 minutes
- Total Time: 90 minutes
- Yield: 2 cups 1x
- Category: Dairy
- Method: Cooking
- Cuisine: Indian
- Diet: Kosher
Description
Sure, you can buy this firm cheese at the store to make your own homemade curries, but where’s the fun in that?! If you have a pot, a strainer, and some cheesecloth, you can have fresh homemade paneer cheese in about 30 minutes.
Ingredients
- 1/2 gallon
- whole milk, not UHT pasteurized
- 1/4 cup lemon juice or vinegar
- 1/4 to 1/2 teaspoon salt
Instructions
-
Heat the milk: Pour the milk into the saucepan and set over medium heat. Bring the milk to a bare simmer — just below the boil at around 200°F. Stir the milk occasionally, scraping the bottom of the pot to make sure the milk doesn’t scald. When ready, the milk will look foamy and steamy.
-
Add the lemon juice: Remove the milk from heat and stir in the lemon juice. The milk should begin to curdle immediately, but it’s ok if it doesn’t.
-
Let the milk stand for 10 minutes: Cover the milk and let stand for 10 minutes to give the acid time to completely separate the curds and whey. At the end of 10 minutes, the curds should be completely separated and the liquid should look yellow and watery. If the milk hasn’t separated, try adding another tablespoon of acid. If it still won’t separate, check your milk and be sure you are using non-UHT milk; this kind of milk won’t separate.
-
Strain the curds: Set a strainer or colander over a mixing bowl and line it with cheesecloth, a nut bag, or other straining cloth. Carefully scoop or pour the curds into the strainer, letting the whey collect in the bowl beneath.
-
Squeeze the curds: Gather the cheesecloth in your hand and gently squeeze to remove the excess whey.
-
Salt the curds: Open the cheesecloth and sprinkle 1/4 teaspoon of salt over the curds. Stir gently and taste. Add more salt if desired.
-
Press the curds: Transfer the curds (still in the cheesecloth) to a large dinner plate. Shape them into a rough square and then fold the cheesecloth tightly around the curds to form a neat rectangular package. Set a second plate on top of the package and weigh it down. Press for at least 15 minutes or up to 1 hour.
-
Use or refrigerate the paneer: Once pressed, your paneer is finished and ready to use. You can use it immediately or refrigerate for up to two days. Refrigerated paneer will be firmer and less likely to crumble than fresh paneer.
Notes
This recipe can be found here using this link.
Keywords: Paneer, homemade cheese, kosher, gluten free
Here’s a link to Garlic Gnocchi with Paneer and Spinach that uses Homemade Paneer Cheese!

Garlic Gnocchi with Paneer and Spinach

Leave a Reply